Technical Tip
You can also enter new bin locations in the Warehouse master file (refer to "File - Warehouse - Bins"). Using this option, however, allows users to add bin locations without being able to edit other warehouse details.
Use this option to enter the details of a new bin location.
|
|
|
Technical Tip You can also enter new bin locations in the Warehouse master file (refer to "File - Warehouse - Bins"). Using this option, however, allows users to add bin locations without being able to edit other warehouse details. |
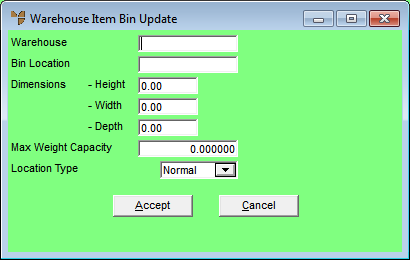
Micronet displays the Warehouse Item Bin Update screen.
|
|
Field |
Value |
|
|
Warehouse |
Enter the warehouse ID for the new bin location. You can also press Tab or Enter to select a warehouse. |
|
|
Bin Location |
Enter a unique ID for the bin location, up to eight characters. |
|
|
Dimensions - Height, Width, Depth |
The dimensions are reference fields only. Enter the height, width and depth of the bin in metres. |
|
|
Max Weight Capacity |
Enter the maximum weight load for the bin in your preferred weight units, e.g. kilograms or tonnes. This is a reference field only. |
|
|
Quarantine Location |
Select whether the bin is a quarantine location. The options are:
|
|
|
Location Type |
2.8 Feature This field replaces Quarantine Location in v2.7. Select the type of bin location. The options are:
|
| Zone |
2.8 Feature
|
|
| Sort Sequence |
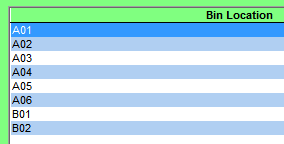
2.8 Feature If you want items on a PDA to be sorted in a specific bin location order, rather than just alphabetically by bin number, enter the sort sequence number for this bin. For example, this screen shows the default (alphabetical) sort order for the following bins:
If you would prefer these bins sorted, say, by the way they are arranged within the warehouse, you might enter the following sort sequence for each bin:
The bins would then be displayed on the PDA in the following order:
|
|
|
|
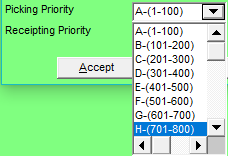
Picking Priority |
2.8 Feature If the Use Bin Priority Range field on the Inventory Configuration screen is set to Yes (see "Edit - Program - Inventory"), select the zone for this bin from A to Z. Depending on the zone selected, Micronet will automatically assign a bin priority within the range for that zone (e.g. C = priorities 201-300) when an item is first picked from the bin.
|
|
|
Receipting Priority |
2.8 Feature If the Use Bin Priority Range field on the Inventory Configuration screen is set to Yes (see "Edit - Program - Inventory"), select the zone for this bin from A to Z. Depending on the zone selected, Micronet will automatically assign a bin priority within the range for that zone (e.g. G = priorities 601-700) when an item is first receipted into the bin. |
|
|
|
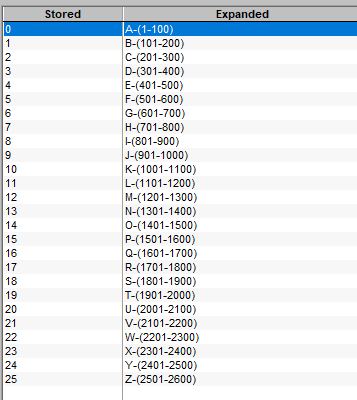
Technical Tip Note that if you are importing the values into these fields, the values are 0–25 and not A–Z. The fields to import into are WAREHBIN_PICKRANGE and WAREHBIN_RECRANGE.
|
|
|
Default Credit Location |
2.8 Feature Select Yes if you want this bin to be the default bin for stock returned via credit notes. You can only set one bin per warehouse as the default credit location. If you set the Default Credit Location for a bin to Yes, Micronet will automatically change this setting to No on any other bins for the warehouse that are set to Yes. To use this feature so that Micronet automatically selects the default bin for returned stock, you need to tick the option to USE DEFAULT BIN LOCATION on the Credit Creation screen – see "Credit Creation - Edit - Use Default Bin Location". |
Micronet redisplays the Warehouse Item Bin Update screen so you can add further bin locations.